


Content: 0.96 Quadratmeter (€38.49* / 1 Quadratmeter)


Garage floor PVC tiles - unbeatable in appearance and design.
Garage floor tiles should always be chosen so that they can withstand particularly high stress. For many car owners, the garage not only provides a protected area for their vehicle, but often also serves as a shelter or workshop. In most cases, the garage floor tends to have a rough surface because it is slip-resistant. Garage floor tiles are a great choice if you want to beautify your garage floor. They are available in numerous looks and offer a long life.
PVC tiles are a particularly good choice in the garage because they offer many uses, are extremely sturdy and durable. Click tiles are particularly easy to install. These have no problem with the moisture that may occur and they are available for purchase in many different designs, so there is something for every taste. When moving, you can simply move the tiles with you and they can be expanded. A great advantage of the PVC tiles is also that they are easy to clean and visually in no way inferior to the original tiles. If you need more information about the installation, the price and the possible design selection, then Schaub und Sohn will be happy to help you and answer all your questions.
Garage floor renovation - What to look out for?
Basically, there are two options you can use if you want to renovate your garage floor. The method that is certainly often used is coating with epoxy resin. However, you can also do a plastic-based renovation. If you want to renovate your garage floor, you should give priority to two-component products, because they have the advantage of being much more durable and also extremely robust.
You should know that a garage floor can only be refurbished if the substrate, thus the concrete floor, is still intact. This means that if the concrete floor is sandy and crumbly or the foundation has even been washed out, then it is almost hopeless to renovate its garage floor. In such a case, you should think about a new floor. If you have any questions about the execution of the renovation of your garage floor or if you need professional support, please contact Schaub und Sohn. The specialist in garage floor renovation and beautification will be happy to help you.
Repairing the garage floor yourself
Have you noticed minimal height differences on your garage floor or does your floor slightly sag and sand in some places? Maybe there are some cracks or there are even deep caves? In many cases, these occurrences can be easily fixed if there is no significant damage. Particularly deep cracks in the subfloor or even possible undercutting are not easy to fix, so you'll have to do a little more hands-on work and possibly pour or lay a completely new floor.
If you discover only slight damage in your garage floor, then it is usually not a problem to repair this floor. Minimal unevenness in your concrete floor can be excellently repaired with a so-called leveling levelling compound. The handling of such a leveling compound is relatively simple, so prior knowledge is not necessarily required. On the package is exactly indicated how to mix the leveling compound, so you can quickly get started here.
After mixing, you can simply pour the leveling compound onto your concrete floor and, if necessary, spread it over it using a spatula. The level surface will appear almost by itself. However, it is highly advisable that you choose a product for the leveling compound that is approved for the non-frost garage floor, because moisture always occurs in garage floors and so your flooring would not be damaged even in the long run.
An interesting option, PVC tiles in the garage.
PVC tiles can be used more flexibly than almost any other flooring. They are perfect for outdoor as well as indoor use, and since they are also excellent for laying in damp areas, they are very suitable for the basement or garage. PVC tiles are very easy to install, preferably floating, but can also be glued to the floor. The PVC click system is a very great asset, because the tiles can be laid even on uneven surfaces, can be claimed immediately after laying and if necessary, you can replace or extend individual tiles. If you move, you can simply move your old PVC tiles with you. They are extremely robust, easy to install and can be cleaned without much effort. The possible different looks also speak for the PVC tiles. You can choose between numerous different designs and also always have the costs in mind. Click tiles made of PVC are also not particularly expensive, considering how flexible you can use them.
Does it make sense to pave a garage floor?
There is always talk that you could also pave your garage floor, does this even make sense? Actually, paving is not a sensible way to renovate his garage floor, because you can not seal such a flooring, so it is not protected from dirt and oil stains. Furthermore, you must obtain a permit from the responsible water management office, whether paving work is permitted in your area. Do you have questions about garage floor renovation and what mistakes you can make or what flooring is useful, so you can inform yourself here.
Garage floor color
A garage floor is in most cases kept gray and rather boring, but it doesn't have to be that way. Nowadays, you can also make your garage floor colorful. There is the perfect garage floor in the perfect color to buy as desired. The finished colorful coating is extremely resilient and hard wearing to boot, likewise it will last for many years. You can use a special cement and floor paint, this is perfect for the garage floor. However, this should be mixed with water before application. However, you should clean your floor from dust, dirt and possibly oil before the first coat. The garage floor paint can be applied only when the floor is free of grease. The drying time may vary somewhat depending on the manufacturer. If you have any questions about the different colors, how to use them or how to implement them, Schaub und Sohn will be happy to help. Contact us now and let us advise you.
Coating garage floors - What you should pay attention to
The garage is not just a place to store your car, bike or other vehicle. For many people the garage is a place where they stay for a longer period of time, some people see the garage as a shelter, other people see it as a hobby room or workshop. In many cases, a garage is not heated and the garage floor can become brittle and unsightly over the years. However, if you want to avoid a broken garage floor in the long run, you should coat your garage floor. A good coating is not only durable, sturdy and looks good, but it also prevents damage that can occur due to moisture.
Which surface is perfect for coating the garage floor?
In stores, you can buy so-called floor coatings, which are coated with epoxy resin. Such a coating is perfect for a garage floor to coat. The advantages are obvious, because such a floor coating will not stain even over the years. Another advantage is that epoxy binds dust, and the surface does not begin to become sandy. Such a protective coating is popular not only for the garage floor, but also in basements, because the concrete is very easy to clean.
Who does not know that, suddenly you find on the garage floor an oil stain or road salt sticks to the substrate. Cleaning in such a case is particularly time-consuming and especially oil stains can not be removed in most cases. A small gray stain usually always remains. If the garage is rented, there may be trouble with the landlord and in the worst case he will have the garage renovated, which can mean that high costs may be incurred by the user. Coating the garage floor is a good choice here, because all these inconveniences will be avoided and the surface will always shine in its usual good appearance.
How can you coat your garage floor without any prior knowledge?
You don't need any prior knowledge to coat your garage floor, because with the right step-by-step instructions, even novice craftsmen can create a professional floor covering. There are only four steps to follow here to ensure your ultimate success.
The preparation
As is the case with almost all crafts, preparation is almost the most important thing before you can do your work. Preparation takes a little longer, however, it provides a tremendous amount of labor relief. If you want to coat your garage floor, then it should be clean, which means that it must be cleaned of oil, dust and dirt. You should also make sure that the existing room temperature is about 10 degrees, because only then is a smooth coating of the garage floor possible. Before coating your garage floor, check it for unevenness and its strength. The best way to check your floor for strength is to take a hammer and tap it a bit in different places on the floor. If the flooring is peeling or a layer is coming off, then your garage floor should be worked on before coating. The subfloor should be sanded. There are special sanding machines that you can easily rent. Furthermore, you should score your subfloor a bit with a spatula, for example, and perform the water test this way. Put a little water in the crack and observe what happens. If the flooring absorbs the water and the spot becomes a little darker, you can assume that it is particularly absorbent. In such a case, you should treat your garage floor with deep primer before coating it. Primer can give your garage floor a longer life.
Sanding
Most garage floors need to be treated before sealing, so sanding is essential, especially if the substrate is already aging. If necessary, the top layer must be removed properly with a sander. You can use a suitable sanding disc with the appropriate grit here and a so-called milling disc. Always keep the grinder moving while you are working with it, otherwise your concrete floor would later show different depths and thus become uneven. If you are satisfied with your work, then take a commercial vacuum cleaner and vacuum the ground floor properly up to the corners. There should be no more dust or residue from the old flooring.
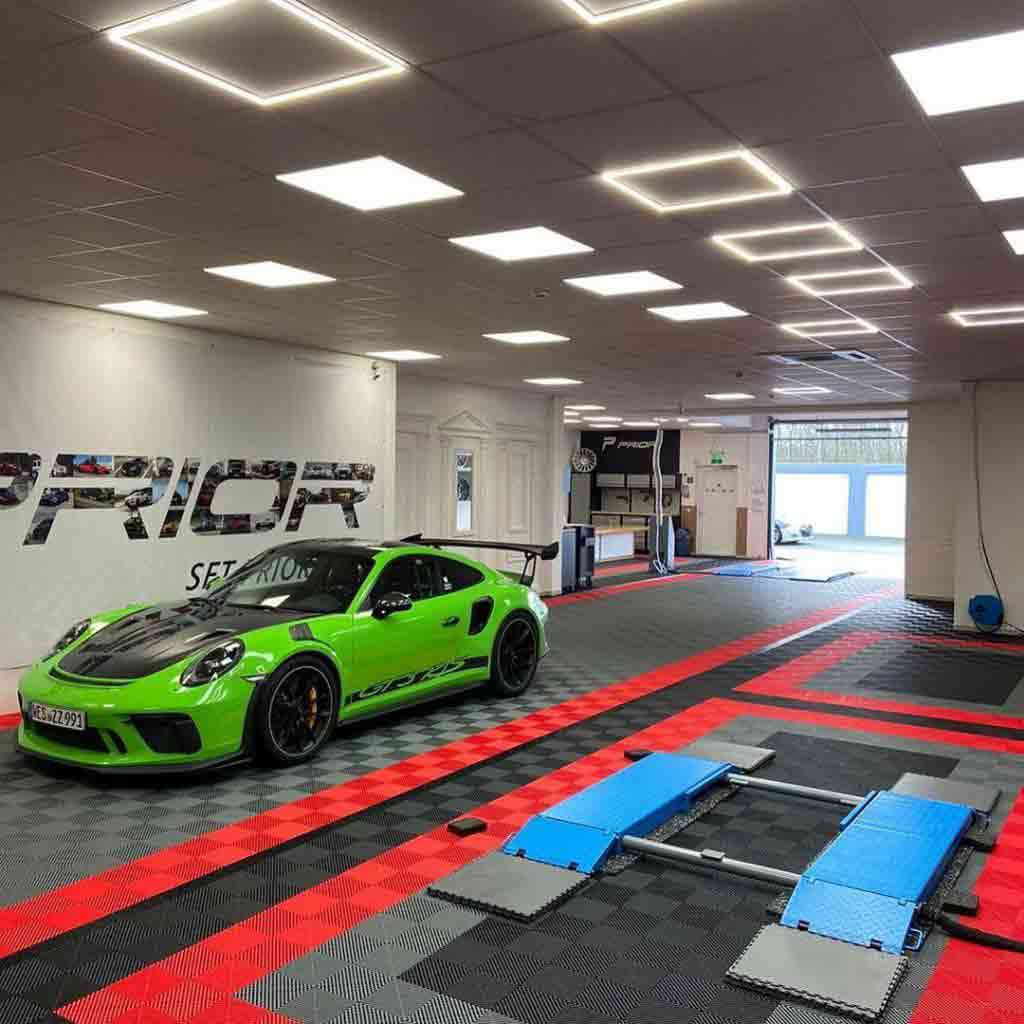
How a garage floor could look like later and what other options are available to you, you can see here.
The deep primer
If you want your subfloor to be and remain durable and stable, then a deep primer must not be missing. To reduce the absorbency of the screed, a depth primer is ideal. The depth primer must simply be mixed with water, in which ratio is always indicated on the packaging. The depth primer is applied with a special floor brush. It is especially important, if you have primed the substrate, that this in no case shines or lies shiny on the surface. The general drying time for the deep primer when you have applied it is about 5 hours.
Coating garage floor - what you should pay attention to
The garage is not only a place where you can store your car, bicycle or other vehicle. For many people the garage is a place where they stay for a longer time, some people see the garage as a shelter, other people see it as a hobby room or workshop. In many cases, a garage is not heated and the garage floor can become brittle and unsightly over the years. However, if you want to avoid a broken garage floor in the long run, you should coat your garage floor. A good coating is not only durable, sturdy and looks good, but it also prevents damage that can occur due to moisture.
Which substrate is perfect if you want to coat your garage floor?
In stores, you can buy so-called floor coatings, which are coated with epoxy resin. Such a coating is perfect for a garage floor to coat. The advantages are obvious, because such a floor coating will not stain even over the years. Another advantage is that epoxy binds dust, and the surface does not begin to become sandy. Such a protective coating is popular not only for the garage floor, but also in basements, because the concrete is very easy to clean.
Who does not know that, suddenly you find on the garage floor an oil stain or road salt sticks to the substrate. Cleaning in such a case is particularly time-consuming and especially oil stains can not be removed in most cases. A small gray stain usually always remains. If the garage is rented, there may be trouble with the landlord and in the worst case he will have the garage renovated, which can mean that high costs may be incurred by the user. Coating the garage floor is a good choice here, because all these inconveniences will be avoided and the surface will always shine in its usual good appearance.
How can you coat your garage floor without any prior knowledge?
You don't need any prior knowledge to coat your garage
floor, because with the right step-by-step instructions, even novice craftsmen
can create a professional floor covering. There are only four steps to follow
here to ensure your ultimate success.
The preparation
As is the case with almost all crafts, preparation is almost
the most important thing before you can do your work. Preparation takes a
little longer, however, it provides a tremendous amount of labor savings. If
you want to coat your garage floor, then it should be clean, which means that
it must be cleaned of oil, dust and dirt. You should also make sure that the
existing room temperature is about 10 degrees, because only then is a smooth
coating of the garage floor possible. Before coating your garage floor, check
it for unevenness and its strength. The best way to check your floor for
strength is to take a hammer and tap it a bit in different places on the floor.
If the flooring is peeling or a layer is coming off, then your garage floor
should be worked on before coating. The subfloor should be sanded. There are
special sanding machines that you can easily rent. Furthermore, you should
score your subfloor a bit with a spatula, for example, and perform the water
test this way. Put a little water in the crack and observe what happens. If the
flooring absorbs the water and the spot becomes a little darker, you can assume
that it is particularly absorbent. In such a case, you should treat your garage
floor with deep primer before coating it. Primer can give your garage floor a
longer life.
Sanding
Most garage floors need to be treated before sealing, so
sanding is essential, especially if the substrate is already aging. If
necessary, the top layer must be removed properly with a sander. You can use a
suitable sanding disc with the appropriate grit here and a so-called milling
disc. Always keep the grinder moving while you are working with it, otherwise
your concrete floor would later show different depths and thus become uneven.
If you are satisfied with your work, then take a commercial vacuum cleaner and
vacuum the ground floor properly up to the corners. There should be no more
dust or residue from the old flooring.
How a garage floor could look like later and what other
options are available to you, you can see here.
The deep primer
If you want your subfloor to be and remain durable and
stable, then a deep primer must not be missing. To reduce the absorbency of the
screed, a depth primer is ideal. The depth primer must simply be mixed with
water, in which ratio is always indicated on the packaging. The depth primer is
applied with a special floor brush. It is especially important, if you have
primed the substrate, that this in no case shines or lies shiny on the surface.
The general drying time for the deep primer when you have applied it is about 5
hours.
Coating the garage floor
Once you have properly prepared your substrate and now want to start coating the garage floor, mix the coating with epoxy hardener. This works best if you use a stirring rod for this purpose. Once the two components are mixed together, then pour the existing material into a bucket. Now you need a drill and stir the mass again for about 1 to 2 minutes. In the end, it is important that there is a homogeneous mixture of both components. If you proceed incorrectly here, you may end up with insufficient resistance and the material will also dry differently. Before you can use the material that you have mixed, you should wait for about 10 minutes, because this is the only way that the air that is still present can escape. Otherwise, it could happen that bubbles form after you have applied the coating. It is especially important that you use your mixture within 2 hours after it is finished, otherwise it will harden and can no longer be used or changed. It is advisable to set yourself a stopwatch that you do not lose track of time while working. You can work on the large areas of your garage floor with a short hair roller, this way the application will be much faster. It is also very important that you always work in lanes so that the coating is applied evenly. The drying time is about 12 hours. However, the work is not over yet, because you need to coat your garage floor a 2nd time. The drying time for the 2nd coating is also about 12 hours. You can expect a resistant garage floor after about 12 days. It is also advisable to put your vehicle in the garage again only then.
What does a garage floor coating cost?
Of course, it plays a big role in the expected price, whether you want to coat your garage floor yourself or hire a specialist company. A specialized company is of course much more experienced and you get a perfectly coated garage floor, which is particularly durable and eye-catching. However, if you prefer to do it yourself, you will certainly save a few costs, but you should definitely ask about the important factors in the coating.
The cost if you want to coat garage floor is between 200 and 300 euros per m². You should know that the smaller the space, the more expensive the cost of coating. It can be with particularly small garages also already once that the m² can cost around the 400 euro and upward everything is open. If a simple garage floor coating is sufficient without you having to process the substrate in advance and it also does not have to be deep primed, the costs will naturally drop.
However, there is another alternative possible if you want to install a robust floor covering in your garage. Coating the garage floor is just one option you can choose. More and more garage owners are opting for PVC tiles, or rather click tiles. These are easy to install, durable, and can be easily replaced or extended as needed. Another advantage of PVC tiles is that they can be driven on immediately after installation and you can move them with you when you move. If you are interested in such a laying in your garage, you can inform yourself at schaubundsohn.
Is a garage floor coating non-slip?
You might think that if you apply a coating to your concrete floor, since it is often shiny, that it is not slip resistant. In most cases, however, this is not the case. However, if you want to play it safe, you can add a slip inhibitor right when you mix the coating. In this way, you make your garage floor slip-resistant and are on the safe side. This procedure is especially recommended when working with epoxy resin.
If you want to coat your garage floor, you don't have to do it simply in a boring shade of gray, but you can also choose a color that is colorful. There are so-called deco chips available in stores, which you can simply throw into the resin directly after applying it. If you have applied the coating or are in the process of doing so, the floor can not be walked on immediately, but this can lead to a cumbersome work. There is a way you can still walk on the freshly coated floor. The solution is so-called nail shoes. You can also easily add glass beads to the coating. Your coating will then have the appearance of a normal garage floor, but it will still be slip-resistant.
What other coatings are recommended?
There are many other ways you can coat your garage floor, but not every option offers the benefits of epoxy. A very good and durable alternative for a sturdy and quickly installed garage floor is PVC tiles. These are also great for laying on uneven surfaces, so it's often not even necessary to treat the garage floor beforehand. They are a great asset, especially in rooms where it can often be damp.
The PVC tiles are laid in just one day, can be immediately re-stressed, which means that the floor can be directly walked on again, and heavy loads do not bother such a floor covering at all. Furthermore, dirt, such as oil, dust or other dirt can be removed alone with a little water. Once a PVC tile is damaged, you do not have to replace the entire floor, as is often the case with many other floor coverings. You can simply replace only the defective tile, that saves time and money.
Another advantage of PVC tiles that should be mentioned here is that in many cases they are even acid resistant. They are available for purchase in numerous different looks, so boring gray flooring can be a thing of the past. You can choose from stone tile looks, wood floor looks, or any other look that appeals to you. PVC tiles are a real eye-catcher in any case. If you still need help in this regard or have unanswered questions, you can contact schaubundsohn.
Leveling the garage floor - this is how it works
If there are small unevennesses on the garage floor, they can easily be leveled with a leveling compound, which is self-leveling. You simply pour this compound onto your concrete floor, then it runs and automatically becomes a level surface. However, it is not wrong if you have a so-called smoothing spatula at hand, because with this you can spread the mass again if necessary. However, if there are deep unevennesses on the garage floor, then a filler is indispensable. However, you must clean the concrete floor before using the filler. Be sure to free it from the existing sintered layer. A simpler method, which saves you a lot of work, time and often money, are PVC tiles. They are easy to install, durable and available in many different looks. Particularly appealing are the so-called click tiles, which you can easily lay floating. If you need expert advice on this, you can contact Schaub und Sohn.
Repairing the garage floor - our DIY instructions
The garage floor is brittle, there are many cracks and you may have discovered damp patches? This can be a real nuisance, because who wants to put their much-loved car in a garage where the flooring is no longer the best. In principle, if you want to repair your garage floor, you should have two goals. The first goal is that the damage must be effectively repaired, and the second goal is that the damage does not reoccur. The repair is very simple, because you just need to apply a thin layer of liquid concrete on the floor or where the cracks are. After that, another layer is required, this should have a high consistency. When applying the layer, make sure that it is not thicker than 15 mm. You may need to apply several layers. The last layer should consist of a finer concrete filler. You can also additionally seal your garage floor with epoxy resin at the end.